Hi friends! I am up on The Cut Shoppe blog and the {a flair for buttons} blog with this layout of my daughter. Today I am using the Beautiful You cut file. I cut the file using white card stock. I intended to use white letters, on my blue background, but then an accident happened, and I really liked the accident! When I set the negative down on my paper, I had to go with it! Here is my layout :
Since my daughter's name is Bea, I thought it was the perfect file to use with a pic of her looking her BEAutiful self. I also liked the idea of backing the BEA with a different color. :-) I used a punch to punch out different sizes of butterflies to add as embellishment. I also added some awesome flair from {a flair for buttons}, of course!
The "dream" sentiment on the above flair was perfect -- with little pops of blue. Both the dream flair and the flair below are from the Lovely Words 2 flair set.
Bea had been in the sun the whole weekend, and looked so brown! So that is what I journaled about!
I made a video of my process, if that's something that suits your fancy!
Thank you so much for stopping by! See you again soon! XO o.g.
Hi Friends! Happy Valentine's Day! We are celebrating over at The Cut Shoppe! Here is my contribution:
This is layout in my "Right Now" Traveler's Notebook. My plan is to fill it with things that bring me joy! This photo certainly does that! The cut file I used is one of several cut files found on the Working Title cut file available here.
For this layout I am using items from the May 2018 Clique Kit which was full of PinkFresh Studio Be You and Let Your Heart Decide collections. The background paper is a 12x12 that I cut to size. I backed the heart of this cut file, with a coordinating floral paper.
I love all of the rose gold elements in this collection! I added some matching thread behind the cut file and a few other places for pops of that color. The eyelets on this banner, and the twin also have that same metallic color.
See that face?? Serious love for that face. I added the date and some tabs behind the photo -- more tangled thread for the win.
I also made a video of my process, if that's something that suits your fancy!
The Cut Shoppe is having a bit of a celebratory sale! Use the code BeMine50 to save 50% through the weekend. :-)
Thanks for stopping by! See you again soon! XO o.g.
I cut the file using white card stock. Then, in the Silhouette software I did a "release compound path" witch allowed me to move the pieces around or delete portions of the file. I did a second cut but this time I only cut the inside of the feathers, and I used two different pattern papers. I glued the inside feathers right down to the background paper, but I used foam to pop up the white card stock.
The inside of the feathers are my favorite part.....except I also really like the body of the peacock!!!
Who know I would use that peacock paper? It was perfect for his body don't you think??
I added a few phrase stickers from Tim Holtz that talk about being beautiful, different, and creative. Unique. 😀
I bit of tangled thread placed for extra pops of color and called it done! I made a video of my process if that suits your fancy!
Hi friends! I am up on the {a flair for buttons} blog today with a new layout using three pieces of flair from the shop. Have you ever had one of those photos that you are just waiting for the right product to arrive so you can scrap it?? This is one of those photos for me. Recently, I got some new pieces of flair and Heidi Swapp's Color Fresh collection arrived at my door. Bam! Match made in heaven. Here is my layout:
I love the bright colors with the bold stripe! EEK! I pulled out most of the hearts from the ephemera pack and the stickers and scattered them throughout the page. I also added a few gold hearts that are from the same sheet as the gold words in the collection. The photo corners became arrows when I added them to this background paper. So, see that flair right there beside my daughter's face? PERFECT! It is from the Watercolor Hearts and Flowers flair set.
The 'soar' flair is from the Lovely Words 10 flair set. I love the pops of green it provides to the top of the page!
Hello friends! I am participating in Ali Edward's One Little Word again this year. I have chosen a word each year for quite a few years, and I have never finished all the prompts and ended the year with a documented word. No regrets, I've gotten something good out of each word! This year I decided to document my word using a traveler's notebook, similar to my December Daily. Also similar, I am going to create videos of my process and share them on my youtube channel and other social media. It is my hope that this will be the thing that helps me stick with the documentation.
Today I am sharing two videos on my You Tube channel. The first video I am actually in front of the camera for a bit and I explain my reason for the videos. I show how I've organized my supplies, and then I move into the process of creating my cover and title page. Here is a look:
Once I got that taken care of I got busy on the prompts. Here are the pages:
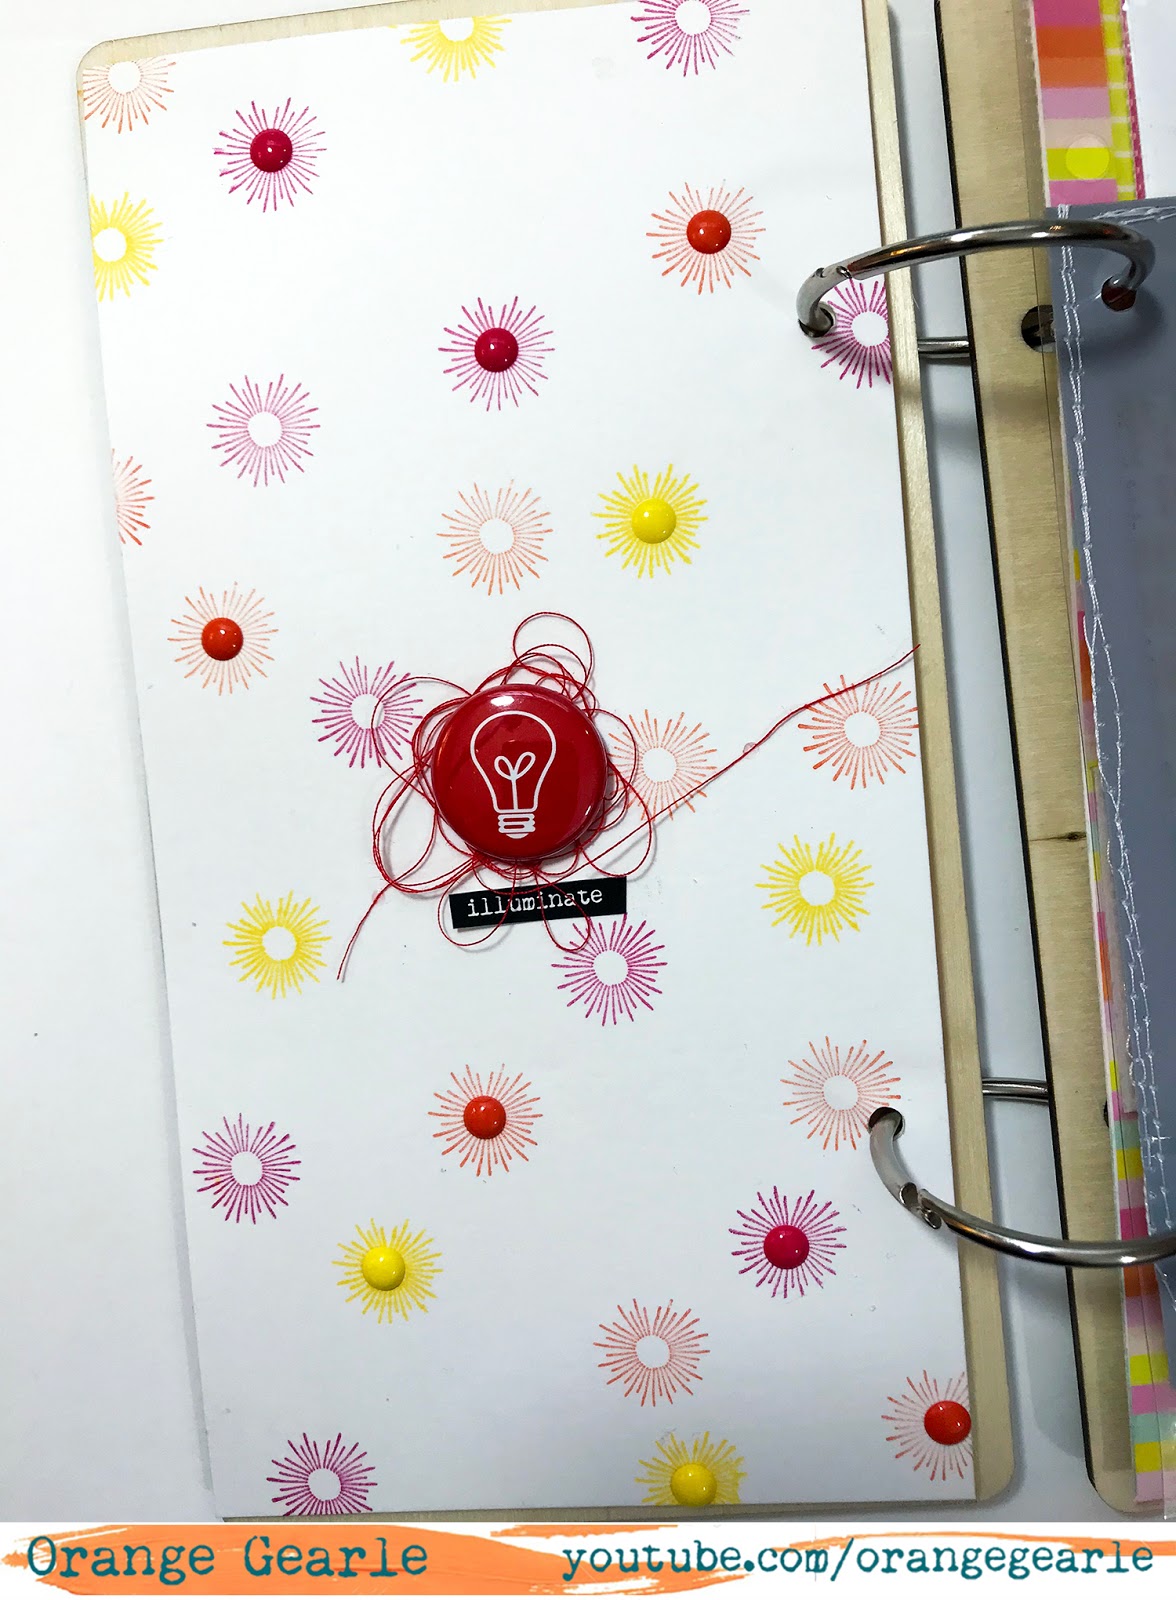
I stamped sunbursts all over the page & added some enamel dots to some of the centers. Then, I used a red lightbulb flair from {a flair for buttons} in the center, with a sticker that says, "illuminate".
Love that thought. Illuminate.
I made a pocket with the "January" card from the main kit and a card from the light kit is on the back. In side the pocket are two cards back to back. One side is my reason why, and the other side is a decorative card.
This is the back of the pocket.
I used a 3x8 page protector for the cards included with the main kit, and to work through the January prompt.
I made a flip out on the page protector so that I could add a couple of extra cards without adding all the space of another 3x8.
I used some new Heidi Swapp Color Fresh papers and washi to create an flip out insert to house the deeper journaling.
To see more details of my process, check out this process video, if that suits your fancy!
Thanks for stopping by, see you again soon! XO o.g.