Pages

Showing posts with label stamping. Show all posts

Monday, November 14, 2016

..:: love this ::..

It's Mix It Up Monday: November Edition on the Paper Issues Blog today!  This month I challenge you to use some inks and/or stamps. Here's my take on the challenge:


I made a background paper (see all that yellow?) using a yellow ink pad, some water, and the packaging technique.  Next I stamped numbers all over it! It's a perfect match with Cocoa Vanilla's Make a Wish collection and for this layout about Bea's seventh birthday.  Here's a close up of the layer that I made.


Grab some Cocoa Vanilla, or any of your paper needs in the Paper Issues Store today. Don't forget to use the code 'orangegearle' for 20% off your purchase!


Thursday, March 17, 2016

:: remember the moments ::

Hi friends! This weekend is the Paper Issues Spring Crop! Woo hoo!  I thought I would share this layout with out that I made during our last crop. I'm using some Maggie Holmes Shine and Ali Edwards stamps.


I started with white card stock and stamped "little moments' over and over to create my background.  Then I used some papers from the Shine collection to create layers behind my photo and add some circles.  Stitching, of course, journaling, and some fun embellishments. Done!

If you haven't joined the Paper Issues {Friends & Fans} Facebook group yet, do that here! You'll get the most up to date info on new items to the store, the fun challenges that we have every month, and, of course, the Spring Crop!


Join us for the Spring Crop!  There are Gift Cards up for grabs (like $250 bucks worth) and there is a whole bunch of new yummies in the shop!  Check it out and use the code 'orangegearle' for 20% off your purchase!


Monday, May 11, 2015

:: sand angels ::

It's new issue Monday on the  Paper Issues Blog!  Our issue is sponsored by SugarPea Designs, and the winner will get a gift certificate to SugarPea Designs (with free shipping)!

Here is my layout for the issue:

The issue, Let's Get This Party Star-ted and Par-ty Heart-y has a long name (which really means there are many ways to interpret the challenge)!  Here are a few ideas (the items I used are in bold):

celebrations of all kinds, graduations, birthdays, weddings, anniversaries, use hearts, golfing (par), stars, stamping, use May printable, use SugarPea Designs products


The SugarPea Designs product that I used is a clear stamp set called Build a Background - Basics (pictured to the right).  These stamps caught my eye because I thought they would be perfect for art journaling, mix media layouts, and to use in my planner! For the challenge, obviously, I chose to do a layout.  I used both of the chevron-looking stamps (top two) with paint and with ink!  I even got to use my small Geli Plate when working with the paint and stamps together! So. Fun.  Here are a few close ups, which include the story:

I started with white card stock and a bunch of washi tape! I stuck with mostly pink and oranges, but various patterns.  One of the washi tapes also had a little bit of blue -- and B.'s shirt is blue, so I went with it. :-)
 I used some orange, yellow and red gelatos to create a layer under the photo.  Then I added the stamping over that with orange StazOn ink.
That bright blue chevron was made with paint.  I used my Geli Plate, spread some blue paint on it with a roller, and then I stamped directly onto the Geli Plate.  Once I made the pattern in the paint that I was looking for, I pulled a couple of prints (using plain white card stock).  I placed these behind the photo.  It was fun!  I absolutely loved working with these stamps from SugarPea Designs!

Check out the rest of the Design Team inspiration over at the blog.  While you are over there, stop in at the store, too!  There are so many new things popping up every day!  The Crate Paper is to die for!  Trust me! Oh and the Webster's Pages stuff (we even have a teal planner in)! OMG I totally forgot to mention the Maggie Holmes Confetti Collection.  Seriously.  So much yummy stuff! Don't forget to use the code orangegearle for 20% off your entire purchase!

Saturday, December 20, 2014

:: it's about the journey ::

Hi friends!  I'm back on the blog at the Rubber Cafe today with a new card made from their December Kit of the Month: Take Flight.


I used some of the patterned papers and card stock to create a mosaic for the back ground and then added the stamped balloon and sentiment. Check out my full post (with supplies) here!  I have really enjoyed playing along with this kit this month!


Thanks for stopping by!  See you again SOON!


Tuesday, September 23, 2014

:: toni from designs : new flair shop ::

Hi friends!  A friend of mine just opened up a new Etsy shop, and she gave me some flair to play around with!


This flair is from her back to school set!  It was the inspiration for most of the colors in my layout!


I grabbed the colors from the flair (and added one from B.'s dress) and found ink in my stash.  I used Ali Edward's new stamp set, on textured white paper and stamped on the diagonal across the page. Viola, patterned paper.

I also stamped on the insert between this two page layout to pull it together.


(more awesome flair from Toni)!


This LO is really a few stories that happened the same morning.  The morning that B. turned five, happened to coincide with her first day of AK (alternative kindergarten) and she got an awesome present!  So I put the stories in the middle in a 6x12 pocket, so I had more room for photos!  :-)

Thanks Toni for letting my play with your new flair!

Toni will be adding new flair to her Etsty shop every Monday!  You can follow her here:

Blog :  http://tonifromdesigns.blogspot.com
IG: tonifromdesigns http://instagram.com/tonifromdesigns
Twitter: @ToniFrom https://twitter.com/ToniFrom]
Pinterest: Toni From http://www.pinterest.com/tonifrom/


PS.  I'm also linking this one up to the Current Issue at Paper Issues!  Anything goes!  Have you linked up yet?

Friday, July 12, 2013

Scrap Your Story :: Hello Cheap Trick

It's FRIDAY!  You know what that means, a great challenge @ the Scrap Your Story Challenge Blog! This week we are working with an awesome sketch!   The sketch (as seen on the right), was a fun one to work with! Two photos, a giant circle,and both a vertical and horizontal line. I stayed fairly true to the sketch, but remember, you can flip, rotate, tweak, whatever you need! I hope to see you play along with us this week!  I grabbed my June Kit from Scrapbook Circle, a few scraps from my scrap box and this is what I came up with :


This past weekend the three of us attended a concert at the zoo in Apple Valley, MN. We had front row seats at this outdoor, all-ages show.  It was Bea's first concert! You will see more photos from this trip at some point; I am currently working on a mini book all about it!

I took the main background paper (Basic Grey :: Bow Ties :: kick the can) and cut a big circle on my Silhouette, then placed another piece of patterned paper (Farmhouse Paper Company :: where ideas take root) behind it. I machine stitched around the circle to define it a bit more, and then added a few stitches in other locations (can never have enough stitches!).  The bright orange arrows are all from the kit as well, they are fuzzy rub-ons (part of the Hipster collection by Basic Grey). I also added some wood veneer shapes that I tinted with orange ink. The "hello" is also from the Hipster Collection, and the "cheap trick" is from Recollections. This was a fun layout to make!

Check out Scrap Your Story and play along this week! I can't wait to see what you come up with!

Friday, June 21, 2013

Scrap Your Story :: a picnic for SUPERS

It's FRIDAY! And we are having a great time this week at Scrap Your Story! Embrace the sunburst!

That awesome sunburst paper is from American Crafts, Shoreline collection. I got it in a Scrapbook Circle kit (I think last summer?).   I used my sewing machine to stitch a bunch of circles and lines on the paper to make it even more sunburst-y (it's a word, really).

The banners are stamps from Ali Edwards.  First I misted some plain white card stock with orange and yellow Mister Huey, then I used orange ink and clear embossing powder to heat emboss them.  After cutting them out, I popped them on with some pop dots for a bit of dimension. For the title I added some DIY Thickers (that I misted with orange Mister Huey) to the picnic tag from Elle's Studio.

This was a fun layout.  I will likely add some journaling to the page, but I haven't decided exactly what or where, and I hate to rush these things!  However, I did print and scrap these photos the same day that I took them!  The girls were having such a good time eating a picnic in their super hero costumes.

Hope you link up over at Scrap Your Story! It's the perfect time of year to embrace that sunburst!

PS, I am counting down the days to when my summer begins.  I cannot wait to have more scrappy time one week from now!

Friday, May 17, 2013

Scrap Your Story :: welcome flowers

It's Friday! You know what that means -- a new challenge!  This week at Scrap Your Story Challenges we are playing with stamps!
I use stamps all the time now that I get stamps from Ali Edwards (@Technique Tuesday) in the mail every month. They are perfect and totally match my style. This layout was no exception. All of the stamps I used were from Ali. Nearly all of the papers and other materials were found in the May Scrapbook Circle kit : My Favorite. Are these papers fun?!  It's early in the month and I've already used most of the papers in the kit!  WOW!

Here are a few close ups:
I used the flower stamp from Ali's "Favorite Circles" stamps all over this page! I love that stamp! It's super simple and can be used for pretty much anything!
This welcome stamp was from "Memories of Home" by Ali Edwards.
In this photo you can sort of see the phrases that I stamped all over the vellum (along with that flower stamp again). The phrases are from Ali's "This Story" stamp set.

The journaling is in a vellum envelope that cut out using my Silhouette Cameo (I've been doing that a lot lately), and I used this blog post for my text. :-) So happy to get this fun story documented!

I hope you play with us this week!

Friday, May 3, 2013

Scrap Your Story :: growing love

UPDATE:  I'm linking this up to Paper Issues Feb. 7, 2015 Issue Hip to Be Square (I used square photos and some {aflairforbuttons} flair.

It's FRIDAY -- and you know what that means -- another challenge at Scrap Your Story Challenge blog! Ready to play along? This is a "theme" week -- and the theme is "favorite(s)".  You can interpret that anyway you wish, as long in your journaling or title we can see that you are sharing something that is a favorite!

I have the word "favorite" a couple of places on this layout.  First I used an Amy Tangerine stamp that I got at Target and stamped "You are my fave" all over a piece of patterned paper.  Then I used one of Amy Tangerine's templates to make a speech bubble with a heart in the middle.  The second place, also involved stamping.  This time it was an Ali Edwards stamp "SUPER favorite" that I stamped over some Elle's studio tags (all supplies are linked below). Most of the rest of the supplies came from the Lucky You Scrapbook Kit by paperissues available here. And of course there is flair from {a flair for buttons}!


This photo was taken on the anniversary of Mikaela's death. It was a difficult day for us all. My daughter Hollyanne came over just to be with us for a while, and I was ever so thankful. I journaled a bit about that, but also about how B. was obsessed with her baby belly! Either way, I wanted the journaling to be hidden. I'm really happy with how this one turned out!  Love that green/yellow combo! Hope you play along with us this week at Scrap Your Story Challenges!


Supplies
Crate Paper :: Party Day :: Happy
My Minds Eye :: Collectable :: Remarkable Smile Grin
American Crafts :: Dear Lizzy Lucky Charm :: 6x6 paper pad
American Crafts :: Dear Lizzy Lucky Charm :: Wild Hearts
Studio Calico :: Here & There :: woodgrain thickers
Glitz :: Color Me Happy :: 6x6 paper pad
Glitz :: Color Me Happy :: woodgrain paper
Glitz :: woodgrain washi tape
Jillibean Soup :: Sunshine Resin Sugar Picks
Studio Calico :: Sundrifter :: flowers and leave wood veneer
My Minds Eye :: Collectable :: Remarkable Day Decorative Buttons
My Minds Eye :: The Sweetest Thing :: enamel dots
a flair for buttons :: arrow 1 flair
a flair for buttons :: lovely words flair
TCW :: Minivine mask
Elle's Studio :: Day to Day tidbits
American Crafts :: Amy Tangerine :: stencils
American Crafts :: Amy Tangerine :: authentic phrase stamp
Technique Tuesday :: Studeio AE :: super fantastic
Heidi Swapp :: Color Shine :: Mustard
Heidi Swapp :: Color Shine :: Mint Green

Friday, April 5, 2013

Scrap Your Story :: top of the world tonight

It's Friday!  That means, pizza and wine for supper (at least for us)...but before that, a new challenge at Scrap Your Story Challenge blog!

This week is our "theme" week -- and April's theme is SPRING! The title of this layout is "Top of the World Tonight", which is my daughter's favorite Cheap Trick song! She's been requesting it and singing it since she could talk! On the lovely spring day that I snapped these photos, she was climbing on top of the rocks in our garden and saying, "See, Mommy, I'm on top of the world tonight!"
These photos were taken during our spring break last year - 2012 (This year during spring break, we were sledding and shoveling snow -- that's Iowa for you)! But last year, it really felt like spring. 

I will admit that I had already started with these background papers for a different layout -- then decided I didn't like it -- but I liked the papers. So, now a month later, I grabbed them again and got busy. First I took the PinkPaislee patterned paper and cut a hole out of the middle.  Then I decided that it was a bit too bright, so I spread Gesso over all of it. Then I added the blue paper in the middle -- it has a little bit of pink in it and I loved the two papers together! I roughed up the inside of the square -- quite a bit -- and sewed it in place.

I've been into vellum lately! I used an Elise Blaha Cripe stamp "get excited" and stamped with yellow ink, in a diagonal, all across the vellum. That was the mat for my highlighted photo. But you really couldn't see what it said, so I also added it to the tab of the hidden journaling -- and I embossed it.
I found this American Crafts flair in my stash, and it was perfect for that rock'n roll sorta aspect of the layout - as an added bonus, it's the right colors.  ;-) The yellow letters are Amy Tangerine letters that I inked with a yellow stamp pad. 
I used my Silhouette Cameo to cut out the "Hello" tab (from 8 tabs by Lori Whitlock). I put some clear embossing powder inside the word hello to highlight it a bit more.
I was going for some layers...

Hope you play along with us this week! This is a fun challenge that goes through Thursday, April 11th 11:59 PM (central).

I also linked this one up to Paper Issues!  Their "Current Issue" is Up in the Clouds!   You have until Saturday, April 6th to link up with them!

AND, if that wasn't enough, I am also taking a "Lots of Layers" class over at My Scraps and More (with the great Audrey Yeager). We were working on peek a book layers.  My peek a boo involves the cut out background, vellum, "hello" cut out....you get the idea!

Saturday, February 9, 2013

:: remember today ::

Last week we had a snow day.  I took a zillion pics.  I grabbed my favorite one and scrapped it -- it's the first photo that I took 2013 that I used for a layout (not counting Project Life).

Journaling reads : "After Snowball fights and sledding in FRESH SNOW, you must have HOT CHOCOLATE!"  I took this journaling straight from a post that I posted to Flickr.  I'm not sure if you can tell or not from the pic, but my favorite part is how I cut a journaling card in half and put one part on top of the photo and the other part at the bottom for the date stamp. Then used an exacto-knife to cut the banner out (it's actually part of the journaling card) and stamped "sweet love" across the top of the card.

For this layout I used my January Scrapbook Circle kit (and a few items from a past kit or two), some flair from A Flair for Buttons, Studio AE January Stamp, and a few little tidbits from my stash. This is the first time that I have participated and submitted something to CSI (Color Stories Inspiration). This is the case file:

I used the colors, of course.  My pieces of evidence are hearts, diecuts and punches.  For the testimony I added a heart to my journaling spot.

Another first for me, I did a little distressing (I used the edge of my scissors) around the edges of my photo mat.


 For a little dimension, I added pop dots to one side of my journaling strips.

I'm pretty happy with the final product.  Pretty simple, but I like it!

Coming soon :  Project life share, and an update on goals (new and ongoing).

Friday, February 1, 2013

:: OLW Blog Hop ::

Welcome to the first One Little Word blog hop of 2013! 
Did you come from Janet's place?  You are in the right place! Thank you for viewing my part of the world for a bit! 
Feel free to look around -- but orange colored glasses are required!
A complete list of participating blogs are listed at the bottom of this post. 


A little more than a week ago I shared my 2013 One Little Word, and how it found me, in this post.  My word is present, but it's really more like two words, be present.  This is my second year participating in Ali's class at Big Picture Classes and I am completely hooked.  Last year my life was...interrupted...and although my 2012 word, balance, stayed with me all year (and will always be a part of me), I didn't participate in the class with the prompts as much as I'd hoped. I am excited as I begin again (aren't new beginnings like magic?) and I am hopeful that I will continue to participate in the class and with this blog hop all year!  I hope you play along, too!

I started a flickr group to share photos related to our words.  Wanna join?  Here's a link.  You should totally join.  All the cool kids are doin' it (OK, right now it's just me, but I'm hoping for other cool kids). ;-)

OK.  Now...to the photos -- when I hop to all these blogs, I always want to see the photos!
I didn't really feel right just starting, so I decided that I needed a title page. I resized a photo (that I took with my iPhone) to 7.5 x 10.5, added a banner and Ali's title card in photoshop, and printed it on my home printer (I'm pretty much doing all my printing at home right now, just for the convenience of it!).  I learned that I LOVE big pictures. OK, I admit, I think I already knew that, but now I know it for realz. Then I cut it up, rounded the corners and voila!  I may add some flair or something to it, I haven't decided.  I might just call 'er done.

two page spread for the prompt (names blurred for privacy)
Wow.  This was a difficult prompt. I didn't put numbers or dates on mine because I feel like I'm going to do them all, all the time, I'm an over achiever like that, yo!  BUT, I do like the idea of having a focus each month.  This month I was mostly just trying to survive, and think about my word, and make a conscience effort to listen, to others as well as myself.  That's not going away, the listening thing.  I know that I'm more of a talker than a listener.  :-)  So this is one that I will need to always focus on! To be present, one must be a listener.
process photo
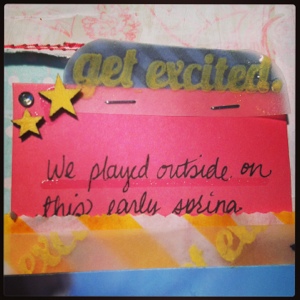
For the main prompt, I used blue and orange StazOn ink to stamp "be present" on the cards (on both white and a light kraft color).  Then I used a fine print, blue sharpie and wrote on each card. The writing is basically the action or intention, I'm not sure what to call it.  For me, these words are the ways I need to "be present", if that makes sense.

I filled the rest of the spots with fun papers from my stash. This month much of it is Amy Tangerine.  I added some alphas, washi, and some other fun.
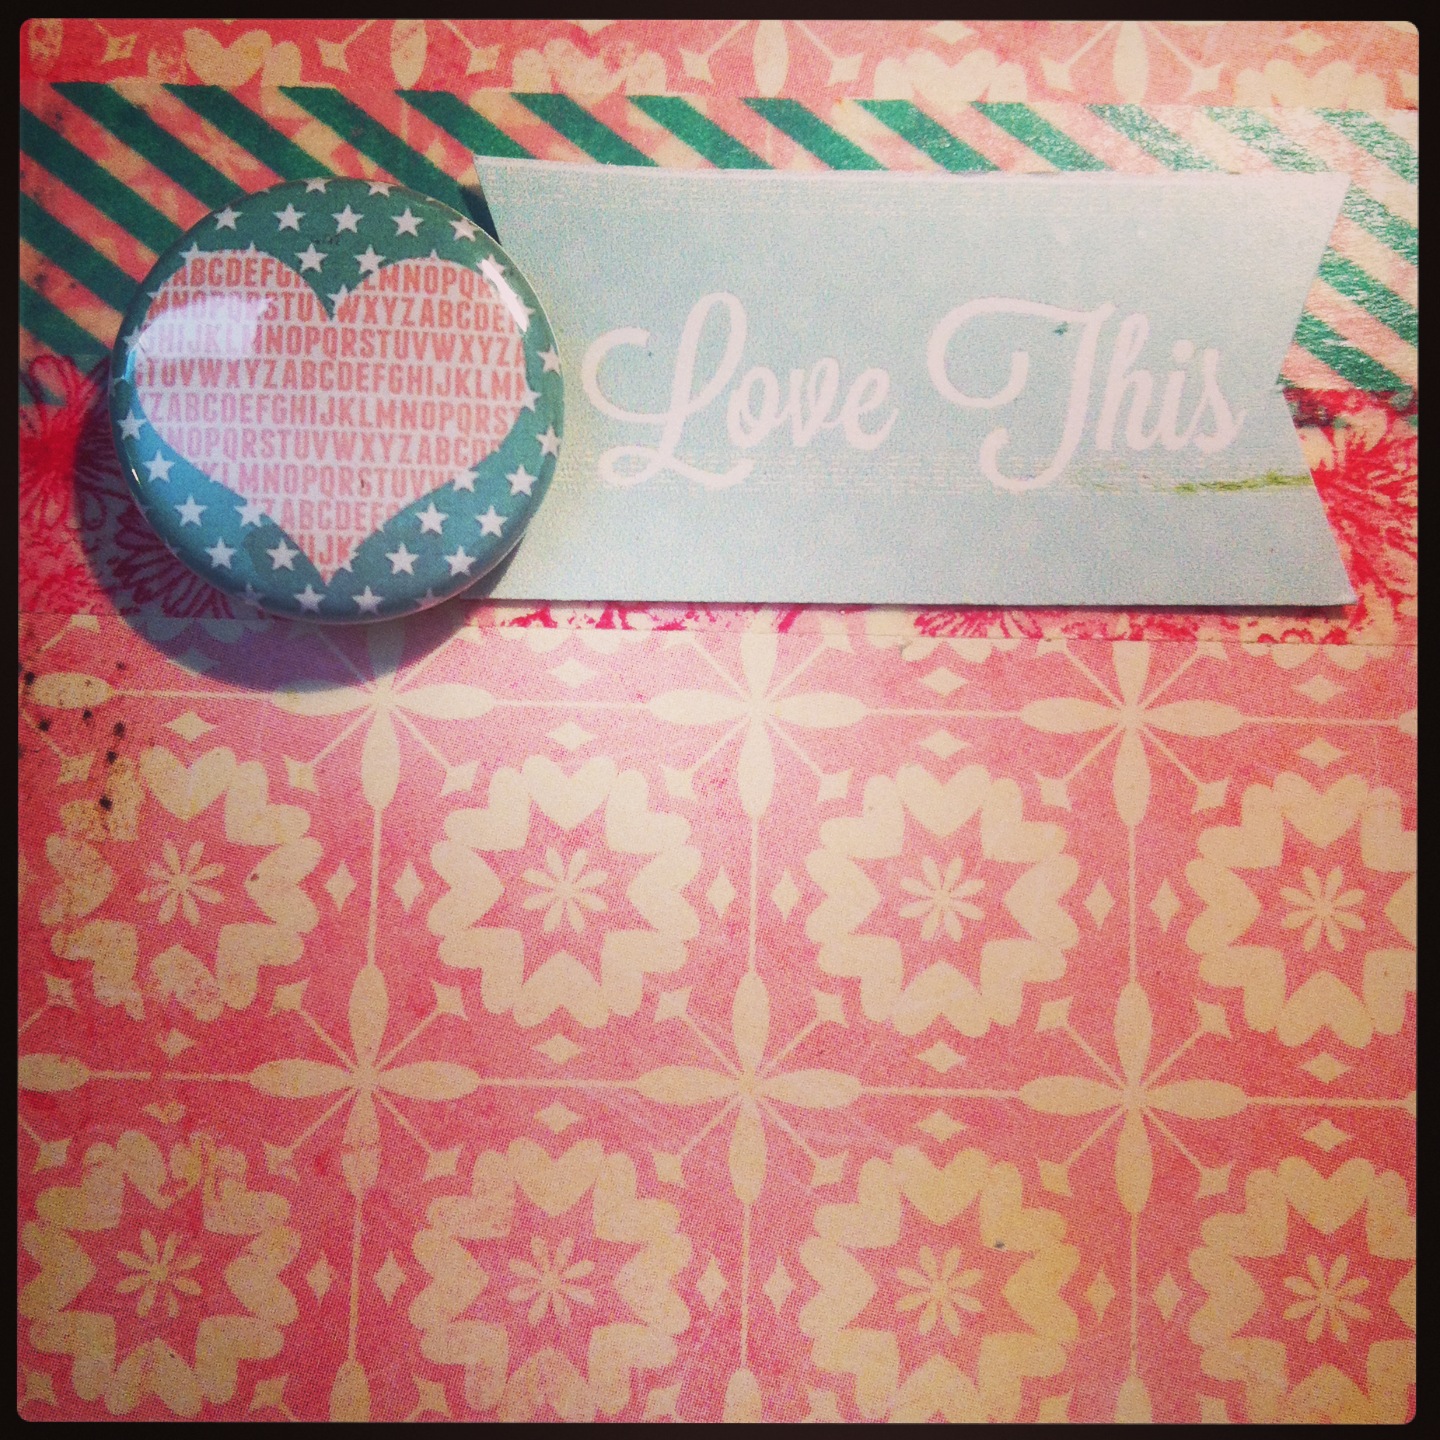
I printed Ali's title card on vellum, as well as a sample that I got from Shelley Haganman at A Flair for Buttons.  She is doing some custom flair for me related to my word and I borrowed one of the .jpg examples that she sent (with permission), printed it on vellum and put it over some of the Amy Tangerine paper. Both pieces of vellum are stapled with the Tiny Attacher.  I am not sure I am finished.  I might put some of the flair that I get on that top left card, or I might replace it with a self portrait.  I haven't decided yet!
I put a little wood veneer camera on this card (Studio Calico paper), but it wasn't quite right.  Then I added a little brad in the middle and I love it (it might be my favorite card)!
blogpost insert front
Finally I printed out most of this blog post on that same light Kraft card stock (front and back) and added a 6x12 insert.
blogpost insert back
Pretty simple, but I'm happy with the result.

One last thing...I am using the same binder that I used last year.  To separate the years I added a divider.
I used some plain (thick) transparency, painted it and added stickers for the year.

Hope you enjoyed seeing my process.  Please continue hopping!  Next stop...Ruth's place!

Here is the complete list of bloggers participating today -- give 'em some love!


Dona <----- That's me!